






Thursday, September 17, 2015

Review: Cocozia's Virgin Coconut Oil & 2 Sugar Scrub Recipes

This is a sponsored post by Epicurex LLC for this delicious
Cocoazia 100% Organic Coconut oil.  All opinions are
totally mine. 

Do you have a big jar of coconut oil and are wishing you knew how to use it for things other than cooking? 

Let me help you out...

I was thrilled to receive 2 jars of Cocozia's 100% Organic Virgin coconut oil
for review.  I feel so pampered & spoiled!! 

How I loved the lovely fragrance that comes from the jar just by opening it!

This oil is great for sauteeing, as it holds the heat and doesn't burn. You really don't taste a coconut flavor...it just tastes clean. 

It's also awesome used as a skin softener. I keep a little container next to my chair in the living room and massage the oil into my cuticles...you'll be surprised how it adds health and strength to your fingernails. 

I love it whirled in my morning coffee.  It can be used as a creamer
replacement...and is better for you! It has a wonderful & pure taste. 

I enjoy adding a teaspoon to my morning smoothie - it adds an energy boost!

I have also used it as the main oil in a chocolate chip cookie recipe and they were awesome. The pure coconut flavor came through and it was delicious. 

I have enjoyed using it to clean and shine my plants by putting some coconut oil on a soft cloth and rubbing the surface of your leaves with it. What a shine! 

From the Cocozia company's description: It has immune-boosting qualities: The antiviral, antimicrobial and anti-fungal properties of coconut oil may be beneficial to the immune system, helping to ward of viruses and bacteria.

I have always been fond of the smell of coconut and lime together, so when I saw this simple recipe at Our Best Bites I had to try it, but revised it slightly.
(They also have an adorable printable label at this post, so be sure to check them out). 

I really love sugar scrubs.  Coconut oil is an amazing moisturizer and sugar is an awesome exfoliant.  And this Cocozia brand is the top of the line!!! 

I've made many Sugar Scrubs before (check out the links below this post)
so I had a little fun using part brown sugar to replace a little of the white.
AND...I squeezed some of the juice from the lime into the mixture too.

I definitely added the grated lime peel...not only is it pretty, but the natural oils in the citrus peel makes a great addition to this scrub. 


COCONUT LIME SUGAR SCRUB 

1/4 c. Cocoazia 100% organic coconut oil
1/2 c. granulated sugar
1/2 c. brown sugar
(If you prefer your mix being all white, use 1 c. white sugar)
zest, finely grated (& juice, optional) of one lime
3 - 4  drops lime essential oils 
2 drops coconut extract 

Place oil, sugars, and lime zest in a bowl.  Stir to combine, and if desired, add additional coconut oil to reach desired consistency.  Add lime and/or coconut oils for a more potent fragrance. Place in jars; label.  Give as gifts, but be sure to keep one for yourself. Use before showering - rinse off scrub then massage in the oils.  SO good for you! Or keep by your kitchen sink - wet your hands, rub together, then rinse. The oils will make your hands feel so soft. 
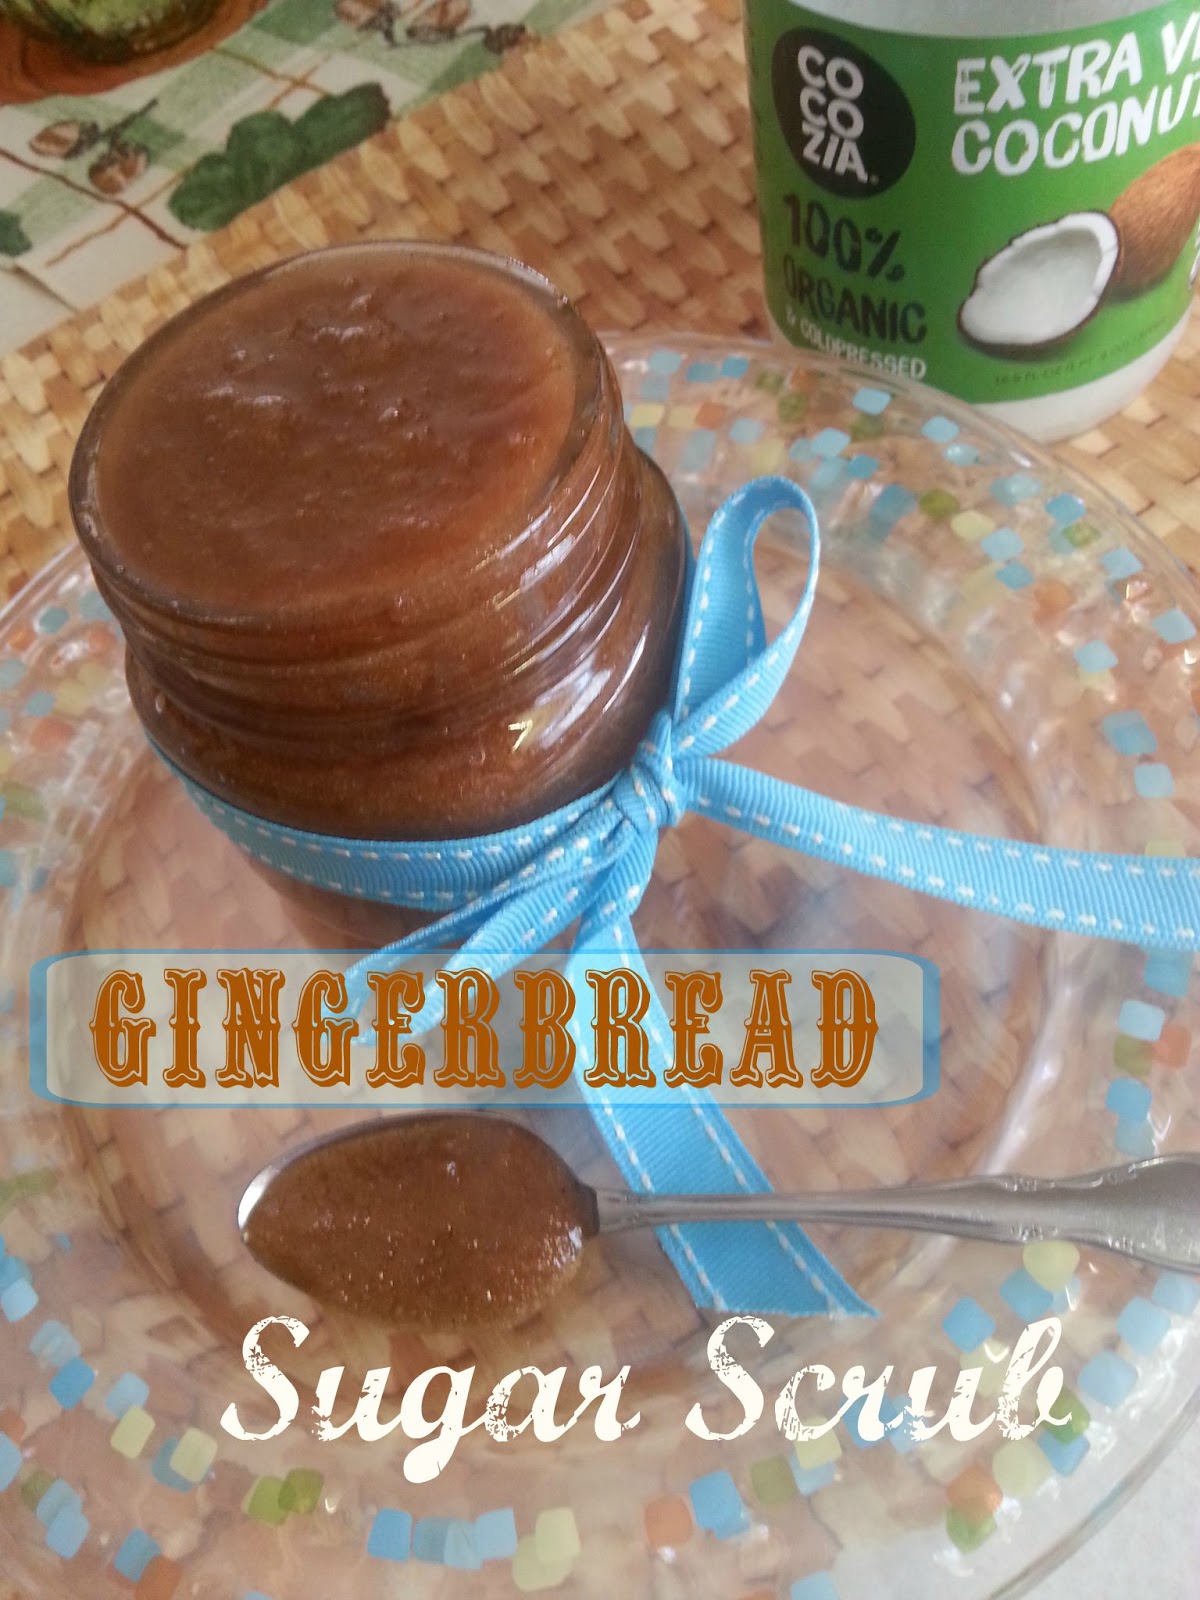

GINGERBREAD SUGAR SCRUB 
1/2 c.  white sugar
1/2 c.  brown sugar
1/3 c. Cocozia 100% organic coconut oil

(I reduced amount of oil (in the recipe) a little after making the scrub...
you can always add more at the end if you want it to be thinner) 
1/2 tsp. vanilla extract
1/2 tsp. almond extract

(or just use 1 tsp. vanilla and no almond)
1/2 tsp. ginger

1-1/2 tsp. Pampered Chef Cinnamon Blend

(It contains cinnamon, nutmeg, allspice, ground orange
peel, cloves and ginger)

(Or you can use these spices that = 1-1/2 tsp.)
1/2 tsp. allspice
1/2 tsp. ginger
1/2 tsp. nutmeg


2 drops cloves essential oil, optional

1/2 pint jar 

In a medium sized bowl combine sugars and coconut oil.  Whip until it blends together nicely.  Add spices and extracts; blend until smooth. Place mixture in jar.  If giving as a gift, tie a bow around the jar or lid. 

Here's some adorable free labels you can print from Cincy Shopper....
such a special touch!  I revised the above recipe I saw there. 

*Disclosure:  I received this product for the purpose of providing a product review.  I promise I will only provide my honest review on this blog.  This post includes my amazon affiliate links. You are not obligated to purchase, but when you do through one of my links, I will make a small percentage on the sale. Thank you for supporting my site.



Print Friendly and PDF

Tuesday, September 15, 2015

No Bake Blueberry Muffin EnergyBalls (Healthy)

This is another one of my buddy Arman's 'no bake' recipes. 
@ The Big Man's World

Easy, delicious and a healthy choice. He also shares a Paleo version at his website if you're interested. I would love for you to stop by and tell him I said hello. 

These 'doughy' bites have protein and very little sugar, so make a batch to enjoy in the afternoon or to have for breakfast!  They can be made dairy free and gluten free as well. 

And doggone it!  I took several photos, but all of them seem blurry...ugh. 

If you go to Arman's blog, he always shares great photos!


NO BAKE BLUEBERRY MUFFIN ENERGY BALLS 

1/2 c. (gluten free) oat flour
1 scoop of vanilla protein powder (Optional)
pinch sea salt
1/4 tsp. cinnamon
1 -2 Tb. granulated sugar (or sugar substitute)
(Arman uses coconut palm)
2 Tb. nut butter of choice 
2 Tb. dried blueberries
1/4- 1 c. (dairy free) milk of choice

In large mixing bowl, combine the flour, protein powder, sea salt & cinnamon; mix well. Add the dried blueberries. Stir in nut butter of choice until mixture is slightly crumbly. Add the milk, 1 Tb. at a time, until a thick, firm dough is formed. Roll into bite sized balls and eat immediately or refrigerate for at least 30 minutes to firm up.

May be kept at room temperature or refrigerated/frozen.

(I put oatmeal in blender to make oat flour; process until flour-like)


Print Friendly and PDF

Sunday, September 13, 2015

Terrific Texas Sheet Cake

I know this is a classic dessert, but I don't have the recipe on my blog and did want to share the way I've made it for years. 

This has been a favorite family recipe since my kids were young.  I remember sitting in my mom's kitchen going through her recipe files before we left for the Air Force, (our second child, Dan, wasn't quite 1 yet) and this was one of those special keepsake recipes...though I didn't know it would be at the time!

(hover over image to pin) 

So when our youngest son, Dave,  stopped by and I showed him this awesome 
Island-Ware Half Sheet Jelly Roll Pan  that I'd been sent to review...
Dave thought filling it with Texas Sheet Cake would be a great 
way to use it.

And...since my hubby's birthday was drawing near, that's just what I did. 

I actually made 1-1/2 X this recipe, then removed about 
1/2 c. of batter, so it wouldn't overflow.

It turned out perfectly even and I was able to top it with a thick,
rich fudgy frosting.  Oh.So.Good!

You can 'jazz' it up by replacing part of the water with coffee....and using it in the frosting too. 

(hover over image to pin) 

TEXAS SHEET CAKE 

1/2 c. margarine or butter (1 stick)
1/2 c. Crisco
4 Tb. baking cocoa
1 c. water
(May use part coffee)

2 eggs, slightly beaten
1/2 c. buttermilk 
(click here for substitute)
1 tsp. baking soda
2 c. all purpose flour
2 c. white sugar
(I use 1-1/2 c. and it's great)
1 tsp. cinnamon
1 tsp. vanilla extract

Preheat oven to 400*. Grease and flour a jelly roll pan - 11" X 15" X 1". Place margarine, Crisco, baking cocoa and water in a medium saucepan.  Bring to rolling boil; remove from heat and let cool while placing remaining ingredients in large bowl.  Pour slightly cooled chocolate mixture over the flour mixture and blend well. Pour into prepared pan and bake for 15 - 18 minutes.  Prepare frosting; pour hot frosting over hot cake.  Let cool before cutting into squares. 

FROSTING: 

6 Tb. margarine or butter
2 heaping Tb. baking cocoa 
4 Tb. milk
1# powdered sugar 
1 tsp. vanilla extract 
1 c. chopped nuts

Place margarine, cocoa and milk in medium saucepan. Bring to a boil. Remove from heat and by hand, stir in powdered sugar (about 3-1/2 c.), vanilla and chopped nuts. Stir until smooth. 

Linked to Weekend Potluck


Peanut Butter Sheet Cake


Luscious Lemon Sheet Cake (3 Ingredients)


Pumpkin Sheet Cake


Print Friendly and PDF

Friday, September 11, 2015

Caramel Apple Cheesecake Squares & Weekend Potluck #187

WELCOME TO WEEKEND POTLUCK
We're always so happy you stopped by! 
(Sharpen your sweet tooth...=)


AND....
When I share something worth sharing...again...


Oh what a taste treat!! A brown sugar crust topped with cream cheese and apples, sprinkled with streusel and drizzled with caramel syrup! 
How could you go wrong? Perfect for fall. 


Now, let's take a quick peek back at last week...

The recipe with the most clicks was ~


Cracker Barrel Copycat Meatloaf by Best of Long Island and Central Florida

Recipes that caught our attention ~


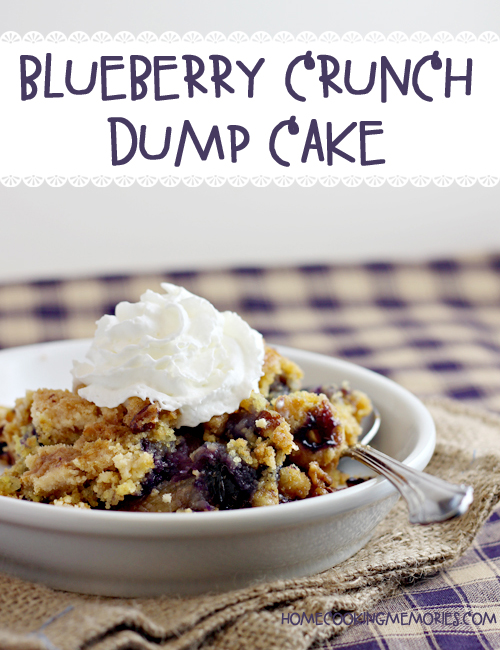
Blueberry Crunch Dump Cake by Home Cooking Memories

Pecan Cobbler
Pecan Cobbler by Call me PMC

And, a personal favorite ~
Orange Doodles at Miz Helen's Country Cottage

Orange Doodles by Miz Helen's Country Cottage 


Your hostesses ~

Remember that when you link up, it shows on all FIVE blogs. Plus…

We TWEET. We PIN. We LIKE.

Linky Guidelines:

If you wish to be a featured recipe or for us to promote your recipe either on Facebook, Twitter, or Pinterest, you MUST follow these instructions.
  1. Please link up to your exact post and not the main page to your blog.
  2. LINK BACK HERE from your post so that others can find the fun.
    When you are kind enough to follow our guidelines, we work hard to get you as much exposure as possible so that your time here is well invested. We want this to be a fun and rewarding experience for everyone!


Wednesday, September 9, 2015

3 Favorite Fall Fruit Crisps {Blast from the Past}

This recipe calls for canned peaches, so it's easy and mighty tasty! 


Delicious warm or cold....serve with ice cream for sweet satisfaction!
That crunchy oatmeal topping makes this an awesome dessert. 

Blastin' Blueberry Crunch


The first time I made this, I served it to company.
We were all so amazed! 


Tuesday, September 8, 2015

Peanut Butter Cup Pudding Cookies - YOWZA!

Oh Yeh!

These are S-P-E-C-I-A-L cookies!

There's instant pudding in the dough...peanut butter chips and miniature Reese's PB cups too!

WHAT'S NOT TO LOVE???

That is...if you're a classic PB & Choc lover...like me! 

I've had such a great time selling baked goods at our local
farmer's market this summer, and this was a new recipe I tried. 
It was a HIT!

I found the recipe at Six Sister's Stuff...their blog is very popular, and
their food is always delicious and wonderful.

The only things I changed were: I (barely) reduced the amount of sugar, and changed up the baking time.  They suggest you bake the cookies 9 - 10 minutes, then cool on the pan for 10 minutes.

I didn't want to have to wait that long in between, so I baked them for
12 minutes...cooled them for 6 and got done just a tad sooner. 

I love this nice thick cookie..it's moist and delicious.
Pour a tall glass of milk and enjoy a few warm from the oven.

The kids will love them for after school snacks or in their lunches! 

IR.RESIST.IBLE! 

(Hover over image to pin) 

PEANUT BUTTER CUP PUDDING COOKIES 

2 sticks (1 c.) butter, room temperature
1/3 c. white sugar
1/3 c. light brown sugar
(original recipe calls for 1/2 c. each sugars)
2 eggs
1 TB. vanilla
2-1/4 c. all purpose flour
1 tsp. baking soda
1/2 tsp. salt
1 (4-serving size) box instant chocolate pudding mix
1 (10 ozs) bag peanut butter chips
1 c. miniature Reese's peanut butter cups

Preheat oven to 350. Line cookie sheet with parchment paper.  In large bowl, beat butter and sugars together until fluffy.  Add eggs and vanilla, blending until smooth. 

Add flour, baking soda and salt to sugar mixture. 
Add dry pudding mix; blend until smooth. Fold in peanut butter chips and Reese's candies; mix just until combined. 

Place heaping Tablespoonsful onto parchment paper; bake for 11 - 12 minutes. (They will still look wet, but will finish baking while standing on pan). 
Cool on pan for 6 minutes; remove from pan to cooling rack. 

Cool to room temperature; store in sealed container or freeze...so they
won't be so tempting under your nose.  =) 

Linked to Weekend Potluck


Print Friendly and PDF

Monday, September 7, 2015

Leader Enterprise - Sept. 2, 2015 - Farmer's Markets & Good-for-you Greens


Happy September & Fall Y'All! 

I've had such a great time at our local farmer's market this summer, my first year to set up a stand selling baked goods. I have gotten such a kick out of talking with town folk and meeting new friends.  I appreciate each one. 

Before farmer's markets begin winding down, I wanted to share these facts about a few of the good-for-you "greens", that we should all be eating.  

Everyone knows veggies are a must in any healthy diet — the phrase “eat your greens” has been drilled into us since childhood. But fewer than 10 percent of Americans eat the recommended amount of fruits and veggies. 

-Green Beans help stabilize your blood sugar:
Also called string beans, green beans are loaded with fiber, which can help lower cholesterol and stabilize blood sugar, making them an excellent choice for people with diabetes.

-Kiwis help you fill up on fiber:
Research shows kiwifruit is surprisingly nutrient-dense. This fuzzy green fruit provides 230 percent of the recommended daily allowance of vitamin C (almost twice that of an orange), more potassium than a banana, and 10 percent of the recommended daily allowances of vitamin E and folate. It’s also a good source of filling fiber. Add kiwi to your yogurt or cereal. 

-Cabbage: A great source of cancer-fighting compounds and vitamin C. Available in red and green varieties, cabbage can be cooked, added raw to salads or stir fries, shredded into a slaw, or made into sauerkraut.  One-half cup cooked has 15 calories.

-Brussels Sprouts: Reduce Blood Pressure
Brussels sprouts have vitamins A and C as well as birth-defect fighting folate and blood pressure-balancing potassium. Not into Brussels sprouts or kale? Consider such other cruciferous veggies as broccoli, arugula, and bok choy. To make Brussels sprouts more tempting, try roasting them.

BALSAMIC ROASTED BRUSSEL SPROUTS
2# washed & trimmed brussel sprouts
1/4 c. olive oil
2 Tb. balsamic vinegar
1 tsp. sea salt
1 tsp. (fresh) black pepper
Preheat oven to 350. Cover cookie sheet/tray with non stick foil. In large bowl, mix olive oil and balsamic vinegar, then add brussel sprouts, stirring until well coated. Place sprouts onto foil; sprinkle with salt & pepper. Roast for 20 minutes, stir until loosened and bake another 20 minutes, or until nice and brown, and tender...thus, caramelized. Remove from oven and serve after cooling a few minutes. 

I just can't say too much good about this awesome and delicious veggie combo.  I can fill my plate with nothing else and be totally satisfied. 
CREAMY TATERS, GREEN BEANS & CARAMELIZED ONIONS
1 lb. green beans (fresh or frozen)
6-8 small new potatoes or 3 or 4 large ones 
1 (vidalia) medium onion, sliced
1/4 c. butter (1/2 a stick), divided
4 ozs. cream cheese 
1/2 c. milk
1/4 tsp. salt
1/4 tsp. pepper

Wash and chunk new potatoes into bite sized pieces. Cover with water and bring to a boil over medium high heat. Add green beans; boil until fork tender, about 10-12 minutes. Place in colander to drain.

While veggies are cooking, melt 2 Tb. butter in large skillet over medium high heat. Add onion slices and cook, stirring often, until tender and are getting nice and brown, about 8 - 10 minutes. Remove from skillet, and place over veggies in colander while you make the sauce. 

In same skillet you used to brown the onions, add remaining 2 Tb. butter, cream cheese, milk, salt, and pepper. Over low heat, stir constantly until cheese melts. Use a whisk to beat lightly until smooth and creamy. Add a little more milk if you want a thinner sauce. Remove from heat. Add veggies from colander; stir to coat with luscious sauce. 

Sprinkle with more pepper if desired. Serve warm. Enjoy!

One of my all time favorites: Charles Swindoll has been quoted as having said "Life is 10% what happens to you, and 90% how you react to it". 

Sunday, September 6, 2015

Caramel Apple Cinnamon Rolls (3-ingredients!)

We all need and love quick and easy recipes.
I have many in my big recipe collections and they're the ones I run to first.

Breakfast 'quicks' are certainly a favorite...we want to eat...NOW!

Using any kind of canned biscuit is also a favorite, so when I saw this
great idea...

HOW ABOUT A CARAMEL APPLE FOR BREAKFAST??

Top canned cinnamon rolls with chopped apples and caramel...

Well, how dare I say no??? 

These are good enough to serve guests!  Enjoy every tasty bite. 

I slightly adapted a recipe I saw at Moments with Mandi, who used
twice as much apple and caramel. (We don't need all that sugar, but
I'm sure it's wonderful). 

I think these would be great with some cooked bacon crumbled over the top...
Next time.....

(Hover over image to pin)

CARAMEL APPLE CINNAMON ROLLS

1 tube ready-to-bake cinnamon rolls, 
(setting aside frosting)
1 large apple, diced
1 c. caramel sauce, divided

Preheat oven to 375. 

Spray a cake pan with non-stick cooking spray, then arrange the rolls in the pan. 

Sprinkle the diced apples evenly over top, then drizzle with half the caramel sauce.  (You could also add chopped nuts if desired). 


Bake 15 - 18 minutes or until golden brown. 

Allow to slightly cool; then drizzle remaining caramel sauce, and 
also some of the frosting from the can over the rolls.  

Serve warm with coffee or milk. 

Linked to Full Plate Thursday
      Weekend Potluck
     Meal Plan Monday


You might also enjoy these dishes using canned biscuits...


Print Friendly and PDF

Printfriendly